
Watering a Garden

Plants need water to grow, but too much or too little water can cause problems like:
Wilting or yellow leaves
Rotting roots
Poor fruit or vegetable production
Pests and diseases
With a little attention and the right approach, you can help your plants stay healthy all season long. Most of these problems can come from too much or too little watering – the best way to figure out which is causing the problem is by checking the soil for moisture. If the soil is dry two inches beneath the soil the garden may be over watered. If it is dry, it is probably underwatered.
When Should You Water?
Early morning is best. Watering before the sun gets too hot helps plants absorb moisture before it evaporates.
Evening is the next best option if mornings aren’t possible, but avoid wetting the leaves too much to prevent mildew or disease overnight.
Avoid midday if possible—the water can evaporate quickly, and sudden cold water on hot roots can shock the plant.
How Often Should You Water?
It depends on the weather and the type of plants you're growing:
Most garden beds need about 1 inch of water per week, including rain.
In hot or windy weather, your plants will need water every day. If it is cool, they should be watered every other day. If it rains, it probably does not need to be watered. Check the day after a rain to see if the soil is dry or moist. If dry, it should be watered.
Stick your finger about 1–2 inches into the soil. If it’s dry at that depth, it’s time to water.
Young seedlings and new transplants need more frequent, gentle watering until they establish roots.
How to Water Effectively
Water at the base of the plant.
Aim for the roots, not the leaves. Wet leaves can invite mold and disease.
Water deeply, not just a little on top.
A deep soak encourages roots to grow downward, making stronger plants.
Use a gentle spray or watering can.
A strong blast from a hose can damage plants or wash away soil.
Adding mulch such as straw, leaves, or wood chips around your plants helps the soil stay cool and damp longer.
Adding fertilizer to your water once a week can help improve your crop.

Square Foot Gardening

Mel Bartholomew invented the square foot gardening method and this is one of his raised beds.
Square Foot Gardening: how to place plants in your garden.
Square foot gardening is easy to learn, efficient way to space plants in a garden. It is a method of growing vegetables in a bed that's divided into a grid of 1 square-foot sections. Instead of planting in long rows, you treat each square as its own mini garden. Each square gets planted with a certain number of plants based on how much space they need to grow. While square foot gardening is traditionally done in raised beds, the principles can be applied to other types of garden beds as well.
Benefits of Square Foot Gardening
Maximizes space – Great for small gardens or raised beds.
Reduces weeds – Dense planting shades the soil, keeping weeds down.
Conserves water – You only water the squares that need it.
Simple to manage – Easy to plan, plant, and rotate crops.
Accessible – Works well for gardeners of all ages and abilities.
How to Get Started
1. Use a raised bed or a garden bed between 2 and 4 feet wide
A 4x8-foot bed is ideal for beginners.
Beds can be bigger, but make sure you can reach the middle from all sides.
2. Add a Grid
Use string, twine, wooden slats, or anything sturdy to divide the bed into 1x1-foot squares.
Drawing lines in the soil can also divide the squares.
3. Plant by the Square
Each square gets planted based on the size of the vegetable.
Plants per square foot:
1 per square: Broccoli, cabbage, pepper, kale
2 per square: Cucumber, eggplant, squash
4 per square: Lettuce, Swiss chard, marigolds
9 per square: Beets, spinach, bush beans
16 per square: Carrots, radishes, green onions
(Check your seed packet for specifics. The best information about a specific variety will be on the seed packet)
Tips to maximise space
Use vertical space: Grow vining crops like peas and beans up a trellis to free up squares for other plants.
Rotate crops: Next season, plant something different in each square to help prevent pests and diseases.
Keep it tidy: Each square is its own zone, making it easy to spot and fix problems.

John D’or Prairie Soil Test
I tested some of the natural soil in the John D’or Prairie garden to check for pH and the three major plant nutrients—nitrogen (N), phosphorus (P), and potassium (K). Here’s what I found:

· Soil pH: 6.5 – The pH scale runs from 0 to 14, with 0 being very acidic and 14 being very alkaline. A reading of 6.5 just slightly acidic, meaning the soil is nearly neutral. That’s good news, because most plants do best in neutral soil. While some plants prefer slightly more acidic or alkaline conditions, we don’t need to adjust the pH since this level works well for most varieties.
· Nitrogen: Depleted – Nitrogen is often the biggest limiting factor in plant growth. That means without enough nitrogen, plants can’t grow properly—even if everything else is in place. To fix this, we’ll need to add nitrogen to the soil. One natural option is to spread about an inch of composted manure over the surface. Fertilizers like Miracle-Gro also supply nitrogen in a form that plants can readily absorb. There is a bottle of organic high nitrogen fertilizer in the greenhouse. I would recommend adding some of the fertilizer to a watering can to water your garden once a week. The recommended fertilizer to water ratio is on the back of the fertilizer bottle, and you can measure the quantity using the cap. Don’t use more fertilizer than recommended on the bottle, because excess nitrogen can “burn” or damage plants.
· Phosphorus: Deficient – Phosphorus is essential for strong roots, flowering, and fruit production. When it's lacking, plants might grow a lot of leaves but fail to produce flowers or fruits—especially crops like tomatoes, cucumbers, squash, broccoli, and cauliflower. To boost phosphorus levels, we can use compost, bone meal, rock phosphate, or fish meal. Bone meal and fish meal attract dogs and other animals, who often dig in and eat the bone or fish meal in the soil, so it might be better to avoid. Ther fertilizer in the greenhouse will also add phosphorous to the soil.
· Potassium: Adequate – Potassium plays a big role in disease resistance and overall plant health. Thankfully, our soil already has some of it. Compost and fertilizer also contribute potassium, so what we're adding for nitrogen should help maintain those levels, too. Composted plant material and food scraps, especially things like banana peels, potatoes, and eggshells all contribute more potassium than composted manure. The fertilizer in the greenhouse also has potassium, but I chose a fertilizer with a higher ratio of nitrogen to phosphorus or potassium because our soil is particularly deficient in nitrogen.

Garden River Soil Test
I tested the soil in the raised garden beds to check for pH and the three major plant nutrients—nitrogen (N), phosphorus (P), and potassium (K). Here’s what I found:

· Soil pH: 6.5 – The pH scale runs from 0 to 14, with 0 being very acidic and 14 being very alkaline. A reading of 6.5 just slightly acidic, meaning the soil is nearly neutral. That’s good news, because most plants do best in neutral soil. While some plants prefer slightly more acidic or alkaline conditions, we don’t need to adjust the pH since this level works well for most varieties.

· Nitrogen: Depleted – Nitrogen is often the biggest limiting factor in plant growth. That means without enough nitrogen, plants can’t grow properly—even if everything else is in place. To fix this, we’ll need to add nitrogen to the soil. One natural option is to spread about an inch of composted manure over the surface. Fertilizers like Miracle-Gro also supply nitrogen in a form that plants can readily absorb. There is a bottle of organic high nitrogen fertilizer in the greenhouse. I would recommend adding some of the fertilizer to a watering can to water your garden once a week. The recommended fertilizer to water ratio is on the back of the fertilizer bottle, and you can measure the quantity using the cap. Don’t use more fertilizer than recommended on the bottle, because excess nitrogen can “burn” or damage plants.
· Phosphorus: Deficient – Phosphorus is essential for strong roots, flowering, and fruit production. When it's lacking, plants might grow a lot of leaves but fail to produce flowers or fruits—especially crops like tomatoes, cucumbers, squash, broccoli, and cauliflower. To boost phosphorus levels, we can use compost, bone meal, rock phosphate, or fish meal. Bone meal and fish meal attract dogs and other animals, who often dig in and eat the bone or fish meal in the soil, so it might be better to avoid. Ther fertilizer in the greenhouse will also add phosphorous to the soil.
· Potassium: Deficient – Potassium plays a big role in disease resistance and overall plant health. Thankfully, our soil already has some of it. Compost and fertilizer also contribute potassium, so what we're adding for nitrogen should help maintain those levels, too. Composted plant material and food scraps, especially things like banana peels, potatoes, and eggshells all contribute more potassium than composted manure. The fertilizer in the greenhouse also has potassium, but I chose a fertilizer with a higher ratio of nitrogen to phosphorus or potassium because our soil is particularly deficient in nitrogen.

Fox Lake Soil Test

I mixed garden soil with water and then added the mixture into these test containers with chemicals that change colour depending on the concentration of nitrogen, phosphorus, or potassium.
I tested the soil for the Fox Lake community garden to check for pH and the three major plant nutrients—nitrogen (N), phosphorus (P), and potassium (K). Here’s what I found:
· Soil pH: 7.0 – The pH scale runs from 0 to 14, with 0 being very acidic and 14 being very alkaline. A reading of 7.0 is right in the middle, meaning the soil is neutral—just like pure water. That’s great news, because most plants do best in neutral soil. While some plants prefer slightly more acidic or alkaline conditions, we don’t need to adjust the pH since this level works well for most varieties.
· Nitrogen: Depleted – Nitrogen is often the biggest limiting factor in plant growth. That means without enough nitrogen, plants can’t grow properly—even if everything else is in place. To fix this, we’ll need to add nitrogen to the soil. One natural option is to spread about an inch of composted manure over the surface. Fertilizers like Miracle-Gro also supply nitrogen in a form that plants can readily absorb. We're also adding potting soil to the tops of the raised beds, which already contains fertilizer and should provide a balanced nutrient mix. There is a bottle of high nitrogen fertilizer in the greenhouse, and adding 15 ml to 1 watering can of water and using it to water your garden plot once a week will help maintain nutrient levels throughout the growing season.
· Phosphorus: Deficient – Phosphorus is essential for strong roots, flowering, and fruit production. When it's lacking, plants might grow a lot of leaves but fail to produce flowers or fruits—especially crops like tomatoes, cucumbers, squash, broccoli, and cauliflower. To boost phosphorus levels, we can use compost, bone meal, rock phosphate, or fish meal. Bone meal and fish meal attract dogs and other animals, who often dig in and eat the bone or fish meal in the soil, so it might be better to avoid.
· Potassium: Adequate – Potassium plays a big role in disease resistance and overall plant health. Thankfully, our soil already has enough of it. Compost also contributes potassium, so the compost we're adding for nitrogen should help maintain those levels, too. Composted plant material and food scraps, especially things like banana peels, potatoes, and eggshells all contribute more potassium than composted manure.

Kayas Pest Management Guide
What are Pests?
Pests are any animal that harm your plants, whether they eat the crops or cause an infection
LRRCN has a short season = fewer pest generations, but damage can happen fast
Cold winters kill many pests, but some overwinter in soil or mulch
Climate impacts pest behavior (e.g., flea beetles thrive in cool spring)
Integrated Pest Management
1. Prevent
Healthy soil, crop rotation, timing
2. Observe
Regular checks, pest ID
3. Intervene
Use least-toxic control methods first
4. Evaluate
Monitor effectiveness and adjust
Prevention is better than cure — especially with short growing windows.
Prevention Strategies
Healthy Soil & Strong Plants
Compost and mulch support plant resilience
Avoid over-fertilizing (aphids love tender growth)
Crop Rotation
Rotate families: brassicas, nightshades, etc.
Prevents soil-borne pests like root maggots
Timing & Row Covers
Delay planting a week or two to avoid early flea beetle peaks
Use row covers on vulnerable crops (e.g., brassicas, carrots)
Companion Planting & Habitat for Beneficials
Plant nasturtiums for aphids, dill/fennel for ladybugs
Encourage native pollinators and predatory insects
Organic Pest Control Methods
Physical Controls
Handpicking pests (e.g., cabbage worms)
Beer traps for slugs
Diatomaceous earth for crawling pests
Netting and collars for seedlings (cutworm barriers)
Home Remedies
Soapy water spray for aphids (1 tsp soap/L water)
Garlic or hot pepper sprays (test before wide use). This can also deter dogs from digging in garden.
Commercial Options
Neem oil – general-purpose insecticide (avoid flowering plants)
Bacillus thuringiensis (Bt) – targets caterpillars
Always follow label directions; avoid harming pollinators
Conventional, not organic, pesticides
Monitoring & Recordkeeping
· Create a simple garden journal or pest log
Note what crops had issues and when
Use yellow sticky traps for monitoring aphids or whiteflies
Learn from experience, test what works in your garden
Common Pests


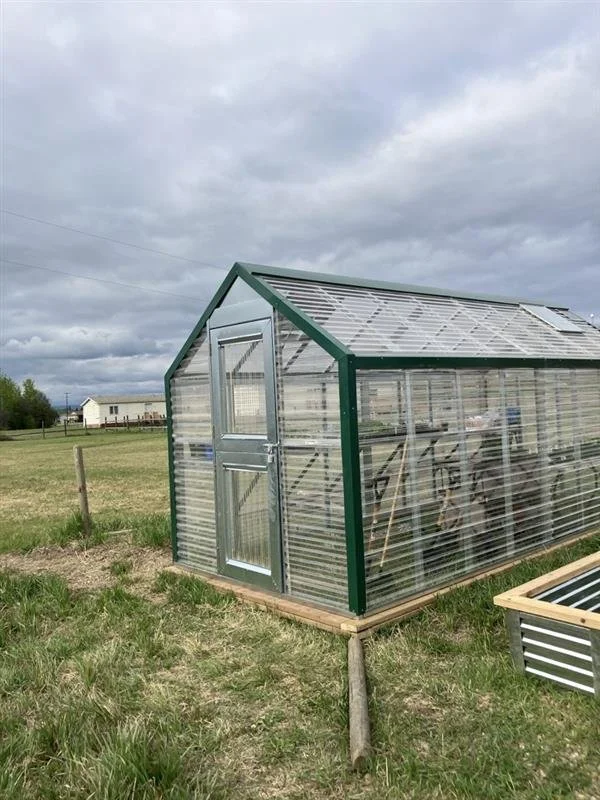
Greenhouse Guide
Advantages of using a greenhouse

Northern Alberta has very low min temps ~50°C
Very short frost-free season: ~45–60 days
Last frost: Often late May to early June
First frost: As early as late August
· Greenhouses protect plants from light frost and extend the growing season has they are warmer and more humid than the outdoors
· Protects from strong winds and pests. Some wind is good- so solar fans can help with air circulation
· Some plants can only be grown in the greenhouse this far north, especially plants that take a long time to grow and are sensitive to cold
How Greenhouses Work
· Captures solar heat (heated passively)
· Physically excludes pests and wind
· Fans circulate air, panels regulate humidity
· Allows light in through transparent walls
Using a Greenhouse to your advantage
· Greenhouses should be oriented East to West to take advantage of the southern sun
· Thermometers can help monitor temperature, vents to cool the greenhouse should be open if it is above approx. 24°C
· Greenhouses are humid, so don’t over water
o Water in the morning to avoid mould
o Use watering cans
· Check plants for pests like aphids, whiteflies
· Remove dead or diseased leaves or plants
· Keep the space clean
Shared Greenhouse Etiquette
· Label your plants and trays
· Share space fairly
· Clean up and remove dead or diseased plants


Kayas Cultural College Community Garden
It all begins with an idea.
Kayas Cultural College has launched community gardens in the three communities of Garden River, Fox Lake, and John D’Or Prairie. At a time when food prices are rising and access to fresh produce is limited, these gardens offer a space where community members can come together to grow nourishing food for themselves and their families. With the support of on-site greenhouses, we’ll be able to extend the growing season into the fall. Gardeners will also receive training and resources to help their gardens thrive. Kayas will host workshops on canning and food safety to ensure that the harvest can be enjoyed year-round.
The Kayas Community Garden Greenhouse in John D’or Prairie.

Kayas Cultural College Succession Planting Guide
It all begins with an idea.
What is succession planting?
· Succession planting maximizes yield by planting and harvest fast growing crops multiple times during the growing season
LRRCN Likely Growing Conditions Overview
Month
Likely Growing Conditions
Late April–May
Start seeds indoors; prep beds; use cold frames/hoop tunnels
Early June
Last frost — direct sow and transplant warm crops
June–July
Peak growing season — plant successions of fast crops
August
Begin harvesting cool crops, plant hardy fall greens
Early Sept
First frost likely — cover crops or greenhouse use only

Tips for successful succession planting
· Choose fast-maturing varieties
o Look for 30–65 day crops. Read the labels on seed packets.
o Avoid slow crops like large cabbages or long-season corn unless grown indoors or with season extension tools.
· Use indoor seed starting
o Have transplants ready when the previous crop is harvested.
o Start second/third rounds of lettuce, kale, or spinach inside while earlier plantings grow.
· Use the greenhouse or row covers
o Protect early and late successions from frost and cold nights.
o Extend the season by 2–4 weeks in both spring and fall.
· Interplant strategically
o Mix quick crops like radishes between rows of slower ones like beets or kale.
· Keep planting!
o You can double or triple your yield with succession planting.

Kayas Healthy Soil Guide
It all begins with an idea.
What is Healthy Soil?
· Minerals- sand, silt, clay
· Organic matter – compost, decomposed plants, soil amendments
· Air and water – make sure the soil it not too compressed, drainage and aeration are important
· Microorganisms and decomposers- fungi, bacteria, worms, insects
· pH – most plants do well near 7.5, different soil amendments can raise or lower pH
· Nutrients – nitrogen, phosphorus, and potassium are the most common “limiting nutrients”
o Most plants remove nitrogen from soil, peas and beans “fix” nitrogen
o Nettles, sunflowers, and borage increase potassium
o Yarrow, dandelion, nettle, and buckwheat increase phosphorus
· Organic and synthetic fertilizer can both improve nutrients, balance is important, so carefully consider what your garden needs (ie, if your pH is too low, don’t add peat)
Assessing Soil
· Soil tests are great – but not necessary if your soil was recently purchased
o At home soil tests can determine the proportions of nutrients in in the soil
o University extension services offer more thorough soil testing services
· Texture test
o Squeeze the soil, is it sandy, sticky, loamy?
· Smell test
o Healthy soil smells earthy
o Acidic or sour smells are generally not good. If soil smells like nothing or dust it probably lacks organic material
o Drainage test – how long does it take for water to drain out of hole?
Building Healthy Soil in a Raised Bed
· Lasagna gardening
o Base layer: cardboard or newspaper to smother weeds and weed seeds
o Second layer: bulk organic material, leaves, straw, sticks, (untreated) grass clippings, wood
o Third layer: compost and topsoil, soil amendments
o Soak each layer with water after adding to the bed
· Year 2 Lasagna Bed
o In the second year, the wood and organic material will be partly broken down and will add nutrients to the soil. You should test the pH of the soil, and add compost or fertilizer
Soil Amendments and Composting
· Add amendments depending on what your soil needs – more is not always better – soil is an ecosystem that relies on nutrient balance to thrive
· Too much phosphorus, carbon, water, etc can do more harm than good
· Mulch around seedlings can prevent weeds and water loss
Compost
Adds organic matter, improves structure, boosts microbes
Year-round; top-dress or mix into beds
Worm castings
Highly nutrient-rich, gentle fertilizer
Around seedlings or in planting holes
Leaf mold
Great for water retention, structure
Fall/winter, or mix into compost
Biochar
Increases microbial life, retains nutrients
Pre-charge with compost or urine before use
Aged manure
Rich in nutrients, builds organic matter
Only use well-aged (6+ months); never fresh
Coconut coir or peat moss
Improves water retention
For sandy soils or container mixes
Greensand, rock phosphate, kelp meal
Mineral boosters
As needed, based on soil tests
What not to do:
· Never use raw manure – manure should be aged for a least 6 months and composted to a high temperature. Raw manure contains dangerous pathogens, and it has enough to nitrogen to “burn’ plants.
· Don’t over fertilize- it can damage the soil ecosystem and cause water pollution
· Avoid compacting the soil
· Don’t add grass clippings or organic material from unknown sources, it could have pesticide residue or pernicious weed seeds
· Try not to leave the soil bare if the weather is going to be warm, mulch protects plants and soil

Kayas Composting Guide
It all begins with an idea.
Compost is one of the best soil builders you can make or buy. It improves fertility, water retention, microbial activity, and structure. Most organic material can be composted under the right conditions. The nutrient profile of compost depends on what organic material was used, but composted manure, food scraps, and lawn clippings are all beneficial.
What Makes Good Compost?
Green (Nitrogen-rich) Materials
Food scraps (veggie/fruit peels)
Fresh grass clippings
Coffee grounds
Manure (herbivore only)
Brown (Carbon-rich) Materials
Dry leaves
Straw or shredded newspaper
Cardboard
Sawdust (untreated wood only)
· Basic Ratio: 2–3 parts brown : 1 part green
How to Compost
Build a compost bin: Untreated wood is the best material, try to make sure whatever you use doesn’t have hazardous chemicals. Ensure it is well contained on all sides to prevent dogs and other animals from getting into it.
Pile size: At least 3x3x3 feet to retain heat
Layer browns and greens, mix periodically,
Keep moist, like a wrung-out sponge
Turn with a pitchfork every 1–2 weeks to add air and speed up decomposition
What Not to Compost
Meat, dairy, oily foods (attract pests)
Food scraps that could attract dogs or other animals
Pet waste (pathogen risk)
Glossy paper or colored ink
Diseased plant material or invasive weeds, plant material that could be contaminated
How to Use Finished Compost
Top dressing: Add 1–2 inches on garden beds each season
Soil mix: Blend into potting soil or seed-starting mix
Compost tea: Brew to water plants and boost microbes. Compost tea can be brewed by steeping compost in water for a few days. Dilute to a 1:4 water to compost tea ratio and use to water plants.
Compost Quality Test
Looks dark and crumbly
Smells earthy, not sour or rotten
No visible food chunks
Feels like moist soil